Become a Seller — Azure Marketplace
Stage 1 — complete this before Automatum
This is a prerequisite. Complete Azure/Partner Center enrollment (approved publisher with validated tax & payout) before you onboard to Automatum. A published offer isn't required first — Automatum can create or sync listings. See Before You Begin for the full readiness checklist.
Selling on Azure Marketplace runs through Microsoft Partner Center and the commercial marketplace program. This guide summarizes each step and links to Microsoft's authoritative docs.
What you'll need to gather
- A work email on a domain your organization owns
- Your Microsoft Partner Network (MPN) ID (or you'll create one during enrollment)
- A government-issued photo ID and the Microsoft Authenticator app, for identity verification — only if you're enrolling a new Partner Center account; already-enrolled publishers are verified
- Business profile and identity verification details
- Tax profile information and a payout (bank) account
Tax before payout
In Partner Center, your tax profile must be submitted and validated before you can create a payout profile. A tax/payout submission can take up to 48 hours to validate. Do these first or publishing will be blocked.
Registration steps
Complete these in order. See Microsoft's Transacting on the commercial marketplace for full detail.
1. Create or sign in to Partner Center and enroll
Sign in at partner.microsoft.com with a work email that owns your domain, and enroll in the commercial marketplace program. → Microsoft: Create a commercial marketplace account
2. Complete publisher onboarding
Provide your business profile. If this is a new Partner Center enrollment, complete identity verification — it requires a government-issued photo ID plus the Microsoft Authenticator app, the name on your account must match your ID, and you must finish within 30 days of enrollment. Already-enrolled publishers are already verified and can skip this. → Microsoft: Complete identity verification
3. Set up your tax profile
Submit your tax profile under Settings → Account settings → Payout and tax. This must be validated before payout setup.
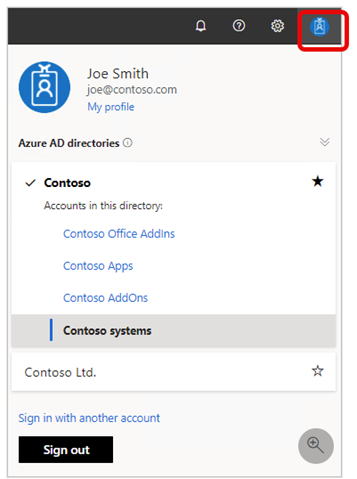
Official Microsoft Learn screenshot, used as a placeholder — replace with your own capture if you prefer.
4. Set up your payout profile
Add your payout method (electronic bank transfer, or PayPal where available). → Microsoft: Set up your payout account
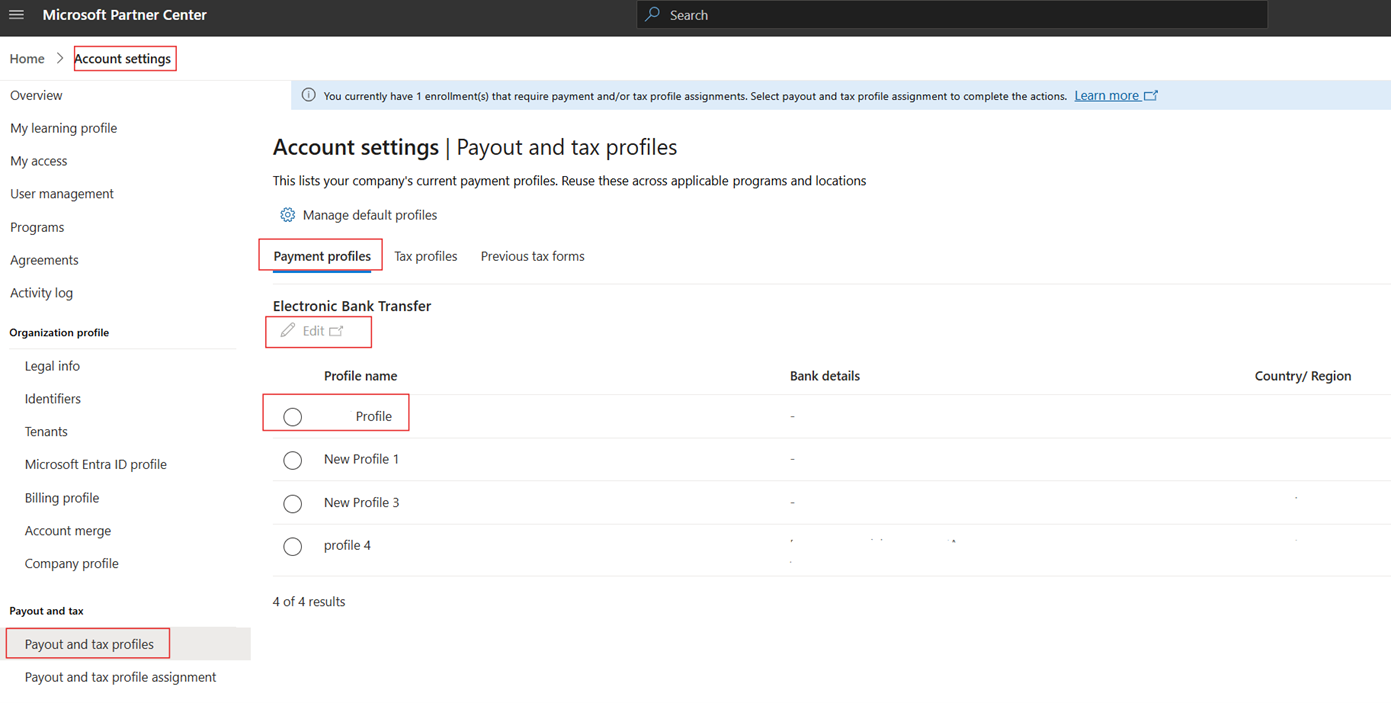
Official Microsoft Learn screenshot, used as a placeholder — replace with your own capture if you prefer.
5. Create your offer
Choose your offer type, define plans and pricing (public and/or private), and implement fulfillment.
Transactable offers need validated tax + payout
You cannot publish a transactable offer until both your tax and payout profiles are validated (validation can take up to ~48 hours). If you're on a deadline, submit these before you start building the offer.
Offer types you can choose from in the commercial marketplace:
| Offer type | What it is |
|---|---|
| SaaS | Cloud-hosted software transacted through Microsoft (subscription or usage-based) |
| Virtual Machine | Software delivered as an Azure VM image buyers deploy |
| Container | Container images buyers run on Azure Kubernetes Service |
| Managed application | A packaged, publisher-managed Azure solution deployed into the buyer's tenant |
| AI / ML | AI and machine learning models and services |
Fees to expect
Microsoft's standard commercial-marketplace fee is approximately 3% for transactable offers. Treat this as a guide and confirm the current rate in the official docs. → Microsoft: Transacting on the commercial marketplace
6. Add listing content and publish
Add the product name, summaries, descriptions, search keywords, and support/privacy links, then publish. Publishing and review typically take several hours to a few days depending on offer type and certification, so plan your go-live date accordingly.
Listings and offers
You don't need a published offer before connecting — once linked, Automatum can create new offers/listings or sync existing ones (syncing is one-way, from Azure into Automatum). See Azure Marketplace overview for details.
Common gotchas
- Tax before payout — the most common blocker; validate the tax profile first.
- Domain-owning email — enrollment requires a work email on a domain you control.
- Validation lead time — profile validation can take up to 48 hours; don't leave it to the last minute.
Next step
Enrolled with tax & payout validated? You've finished Stage 1. Continue to Stage 2 → Connect & Go Live to link your Azure account to Automatum.
Need Help?
Contact hello@automatum.io or use the in-app chat for help with Azure onboarding.